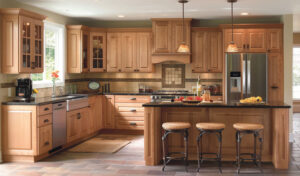
The kitchen is often considered the heart of the home, where families gather to cook, eat, and create lasting memories. However, as time passes, even the most well-crafted kitchen cabinets can start to show signs of wear and tear. The once-vibrant surfaces may become dull and grimy, and the overall aesthetic may no longer align with your personal style or modern design trends. If you find yourself in this situation, it might be time to consider removing your old kitchen cabinets, visit the nearest kitchen cabinets showroom, and giving your space a much-needed facelift.
While the thought of removing kitchen cabinets may seem overwhelming, it’s a project that can be tackled by most homeowners with a little know-how and the right tools. In fact, taking on this task yourself can save you a significant amount of money compared to hiring a professional. With a free weekend and a basic toolkit, you can transform your kitchen and prepare it for a stunning new look.
Assessing Your Kitchen Cabinets
Before diving into the removal process, it’s essential to assess the condition of your cabinets and determine whether they can be salvaged or repurposed. Some cabinets may be structurally sound but simply in need of a fresh coat of paint or new hardware, while others may be beyond repair. If your cabinets are still in good condition, consider donating them to a local charity or selling them online to minimize waste and help others in need.
The Necessary Tools
To ensure a smooth and efficient cabinet removal process, it’s crucial to have the right tools on hand. Most of the tools you’ll need can be found in a basic toolbox, including:
- Screwdriver
- Drill
- Utility knife
- Pry bar
- Wrench
- Hammer
- Safety glasses
- Work gloves
In addition to these tools, you may also want to consider renting or purchasing a reciprocating saw, which can make the process of cutting through stubborn cabinet materials much easier.
Preparing Your Work Area: Before you begin removing your cabinets, take the time to properly prepare your work area. This involves several key steps:
- Empty all cabinets and drawers, and remove any items from the countertops.
- Shut off the water supply and disconnect any electrical appliances in the kitchen.
- Cover the floor and countertops with drop cloths or tarps to protect them from debris and damage.
- Remove any trim or molding around the cabinets using a pry bar and hammer.
- Label each cabinet door, drawer, and shelf with a numbered piece of masking tape to make reassembly easier if you plan on donating or repurposing them.
Removing Upper Cabinets
Start the removal process by focusing on the upper cabinets. Begin by unscrewing any cabinet doors and removing the hinges. If you plan on reusing the doors, keep the hardware together in labeled bags for easy reassembly. Next, remove any shelves and label them accordingly.
To detach the cabinets from the wall, first locate the screws that secure them in place. These screws may be located on the inside of the cabinet, along the top and bottom edges. If your cabinets are held in place by glue or adhesive, you may need to use a pry bar or reciprocating saw to carefully separate them from the wall.
As you remove each cabinet, be sure to have a helper nearby to assist in supporting the weight and safely lowering them to the ground. If you’re working alone, consider using temporary support brackets to hold the cabinets in place as you work.
Removing Lower Cabinets
Removing lower cabinets follows a similar process to removing upper cabinets, with a few additional considerations. Start by removing the sink, faucet, and any connected plumbing. This may require the assistance of a professional plumber if you’re not comfortable working with water lines.
Next, remove the countertops by unscrewing them from the base cabinets and carefully lifting them away. If your countertops are glued in place, you may need to use a pry bar or reciprocating saw to separate them from the cabinets.
With the sink and countertops removed, you can now focus on detaching the lower cabinets from the wall and each other. As with the upper cabinets, locate and remove any screws that secure the cabinets in place. If the cabinets are connected to each other, you may need to remove additional screws or brackets that join them together.
Disposing of Old Cabinets
Once you’ve successfully removed all of your old kitchen cabinets, it’s important to dispose of them properly. If the cabinets are still in good condition, consider donating them to a local charity or habitat for humanity store. This not only keeps them out of the landfill but also provides others with the opportunity to give them a second life.
If the cabinets are damaged beyond repair, you’ll need to dispose of them as construction waste. Many cities offer special pick-up services for large items like cabinets, or you can rent a dumpster for the duration of your project. Be sure to check with your local waste management company for specific guidelines and requirements.
Preparing for New Kitchen Cabinets
With your old cabinets removed, you can now focus on preparing your kitchen for its new look. This may involve repairing any damage to the walls or floors, updating electrical or plumbing connections, and ensuring that the space is clean and free of debris.
If you’re planning on installing new kitchen cabinets yourself, take the time to carefully measure your kitchen and create a detailed layout plan. This will help you order the correct size and style of cabinets and ensure a smooth installation process.
Removing your old kitchen cabinets can be a challenging but rewarding project that breathes new life into the heart of your home. By following these step-by-step instructions and taking the necessary precautions, you can successfully transform your kitchen and prepare it for a stunning new look.
Remember to work carefully and methodically, and don’t hesitate to enlist the help of friends, family, or professionals if needed. With a little patience and perseverance, you’ll be well on your way to creating the kitchen of your dreams.


